
Looking to craft the perfect armor stand in Minecraft? Check out this quick recipe and guide to get started!
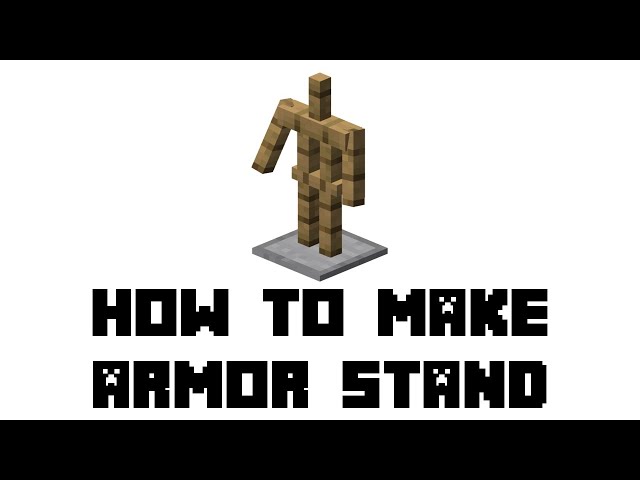
How To Make An Armor Stand Video Tutorial
The video tutorial takes viewers step by step through the process of making an armor stand in Minecraft. This involves learning how to construct and put the essential materials, as well as how to utilize certain instructions. An armor stand is a handy thing to have since it can be used to store and show armor.
Gathering the essential resources – two blocks of planks, two blocks of sticks, a single piece of yellow or white wool, and one ingot or nugget from each kind of metal in the game – is the first step in the tutorial. The video then explains the instructions necessary to manufacture and assemble the armor stand. It not only teaches viewers how to build an armor stand, but it also explains in detail what each command does and why it is required for building an effective armor stand.
The final product is a stylish piece of furniture that can hold a variety of items while keeping your house tidy and organized.
Available Platforms
Using the correct platform makes crafting the ideal armor stand in Minecraft simpler. There are a number of platforms accessible nowadays depending on the sort of armor stand you want to build. Today, the most popular platform is Bedrock Edition, which is accessible on all devices and platforms including as Windows, Xbox, PlayStation, Android, and iOS.
For those who prefer Java Edition, it is available for both Mac and PC.
Other platforms, like as Modded Platforms, may be utilized by users who wish to add additional freedom to designing their armor stands in Minecraft. Modded Platforms enable users to add more features to their Minecraft game and make customisation significantly more accessible than with the regular Java or Bedrock Editions alone. Forge Mod Platforms for singleplayer and VanillaPlus multiplayer are two examples of altered platforms. Each platform provides something unique, therefore it’s critical that players pick the one that best meets their needs.
Materials Needed To Make An Armor Stand
A few simple resources are required to create an armor stand in Minecraft. Six sticks, two blocks of hardwood planks, and one block of iron ingot are included. The six sticks constitute the torso of the armor stand, while the two wooden planks serve as arms. Finally, one block of iron ingot is utilized to make the armor stand’s baseplate.
After gathering these resources, they must be created in the proper sequence:
- Form two wooden boards into a chest shape and join them with four sticks in the corners.
- Add four additional sticks to the corners of your chest shape to build arms for your armor stand.
- Utilize one block of iron ingot as a baseplate for your armor stand on top of your chest form.
When you have accomplished all of these procedures successfully, you will have produced an armor stand that may be utilized anywhere in your world.
Steps To Make An Armor Stand
There are many methods to creating an armor stand in Minecraft. Gather enough materials for the armor stand, namely 6 sticks and 1 stone slab. To make this, enter your player inventory and stack three sticks on the top row of your crafting grid menu. Then, in each of the two bottom rows, put one stick. After that, fill up the remaining space on the far right of the crafting grid menu with stone slab, leaving 1 vacant slot. Then, using your mouse, go to the created item the armor stand and choose it from the menu to add it to your inventory.
After you’ve made an armor stand, you may use commands like “/summon” or “/setblock” to position it anywhere in your world. You may also change how they appear and what they perform with these instructions, such as adding arms or altering their position. You just need to enter /summon ArmorStand[x y z] as follows: /call ArmorStand 200 64 400.
Once installed, you may use another command, such as “/entitydata,” to alter its position or rotation, as well as other settings like as pose locks and invulnerability, which prevents them from receiving damage. After completing all of these procedures, you will have successfully created an armor stand for your Minecraft environment.
Step 1. Open Your Crafting Menu
To make an armor stand in Minecraft, you must first access the crafting menu. You will need a piece of Stick, an Iron Ingot, and four pieces of Wood Planks to complete this task. When you’ve gathered all of these goods in your inventory, enter your Crafting Menu or press E on your keyboard.
The armor stand recipe may be found in the top-right corner of the two by two crafting grid. Drag each item into its respective box, then click the “Finished” button to complete the recipe. Congratulations.
After you’ve created an armor stand in Minecraft, you may go on to the next stage, which is to place it in your Minecraft world.
Step 2. Add The Sticks And Stone Slab To The Menu
You must add the sticks and stone slab to your menu in this phase of creating the ideal armor stand in Minecraft. You’ll need to open the crafting table to do so. After you’ve opened the crafting table, put one stick in the top-left corner, one in the bottom-left corner, and one stone slab in the center of your making grid. This will offer you a 3×3 crafting grid on which you may arrange three things. Once all three pieces have been appropriately put on your 3×3 grid, you are ready to begin building your own armor stand.
Step 3. Move The Armor Stand To Your Inventory
You must use the /give command to add the armor stand to your inventory. This command allows you to give yourself a game item, such as armor stands. To use this command, open in-game chat and enter /give p minecraft:armor stand 1 without the quotation marks. This command will place one armor stand in your inventory. Simply alter the number at the end of the command if you want more than one.
Check your inventory after you perform this command; there should be an armor stand waiting for you. Now that it’s in your inventory, you may construct it into armor or proudly display it throughout the world.

Minecraft Armor Stand Command
In the popular sandbox game, a Minecraft armor stand command is used to create an armor stand. This command is similar to other crafting recipes; except, instead of utilizing things like wood and metal, the armor stand is constructed using commands that you write into your command block. This type of command has the following syntax:
/summon<minecraft:armor_stand [<pos>] [<nbt>] [<nbt>]
The “pos” field enables you to determine the location of the armor stand. The “nbt” section lets you adjust different characteristics of the armor stand, such as its name tag, location, and other attributes. You may use this area, for example, to make the armor stand invisible or to adjust its equipment or health levels. You may also use this command to summon many armor stands at the same time by adding more summons with different names and locations. Crafting a superb Minecraft Armor Stand requires careful preparation and consideration of the qualities you want before accurately typing its instructions.
Java Edition 1.13 and higher armor stand command
The armor stand command in Java Edition 1.13 and above is a form of cheat code that may be used to change the stats and look of an armor stand in Minecraft, an open-world sandbox video game created by Mojang.
The command may be used to specify properties such as no baseplate, no gravity, arms or no arms, and even bespoke postures. It may also be used to place certain pieces of armor on the stand, as well as change the location and direction it faces. It may also be used to add custom commands like weather or seasons that affect the properties of the armorstand in creative mode without having to create individual instructions. It also enables players to adjust the color or form of an armorstand from a distance.
PE – Xbox One – Switch – Win 10 – Education Edition
Minecraft PE, Xbox One, Switch, Windows 10, and Education Editions include a boat command to assist users build creating their own customised armor stands. The boat command may be used in two ways: to produce an armor stand structure in your crafting table, and to spawn an armor stand immediately into your game environment.
The first approach requires the use of various materials, including wooden boards, sticks, and boats. Simply set the boats in each corner of your crafting table, then lay wooden planks and sticks on top of them to make an armor stand. This will result in the creation of an armor stand that you can use to construct or decorate your Minecraft environment.
The second approach enables users to simply insert a ready-made armor stand into their environment without having to manually create one from of objects such as boats and wooden planks. All players need to do is put the appropriate code or command into chat or go to their commands list and pick:
- “spawn” followed by “elder guardian” to spawn an already made elder guardian-style armor stand at the location they want.
More Decoration Recipes
The options for customizing your armor stands in Minecraft are limitless. There are several ways to embellish your room, whether you’re building an amazing display of weapons and equipment or providing a warm home for your people. Here are some additional decorative recipes for creating the ideal armor stand in Minecraft to get you started.
Colored banners are required for one sort of decorating recipe. These may be put on the main body of an armor stand to create a visually appealing display that adds texture and color. To make them, you’ll need colorful wool, paper, sticks, and a dye of your choosing, such as orange. As a consequence, a vivid orange banner with complex designs appears on its surface. Multiple banners may also be stacked together for more intricate displays.
Shields are used in another form of decorative recipe. These may be hung on the arm slots of an armor stand to give it a distinctive aesthetic while also protecting it from hostile mobs or bullets. This recipe calls for:
- one iron ingot each shield,
- three hardwood planks per shield,
- one string per shield,
- two leather shields,
- two dyes red and white,
- one lapis lazuli block for blue.
These components, when combined, can provide gorgeous shields embellished with varied forms and patterns that will really bring any area to life.
More Stories
Minecraft Slope Unblocked: The Complete Guide to Playing Anywhere in 2026
How to Build Epic Minecraft Skyscrapers: Design, Tips, and Techniques for 2026
How To Build An Epic Spruce House In Minecraft: The Complete 2026 Design Guide