
Copper bulbs are one of Minecraft’s most underrated lighting components, introducing dynamic functionality that goes beyond basic illumination. Since their introduction in the Caves & Cliffs update, they’ve become essential for redstone engineers and builders looking to add sophisticated lighting mechanics to their creations. Whether you’re constructing a modern smart home, designing atmospheric dungeons, or building elaborate redstone contraptions, copper bulbs offer flexibility that conventional light sources can’t match. They oxidize over time, respond to redstone signals, and emit different brightness levels depending on their state. This guide covers everything you need to know about copper bulbs, from crafting them to integrating them into advanced builds, so you can harness their full potential in your worlds.
Key Takeaways
- Copper bulbs in Minecraft are redstone-activated light sources that emit light level 15 (maximum brightness) and oxidize naturally over time through four color stages, from orange-brown to deep turquoise.
- To craft a copper bulb, combine 3 raw copper, 1 blaze rod, and 1 redstone dust in a specific crafting table pattern, with blaze rods being the bottleneck resource for large-scale builds.
- Copper bulbs require active redstone signals to emit light, making them ideal for automation, proximity detection, and dynamic lighting systems that respond to player actions or sensor input.
- Use honeycomb to wax copper bulbs at any oxidation stage and prevent further weathering, allowing builders to create intentional color-graded lighting systems and vintage-aesthetic builds.
- Copper bulbs are best utilized in modern architecture, redstone contraptions, and decorative arrays where controlled, signal-dependent illumination adds both functional design and visual sophistication to builds.
- Position copper bulbs 15 blocks apart for even illumination without overlap, and combine them with complementary light sources like torches and lanterns to create layered, dynamic lighting effects without redundancy.
What Are Copper Bulbs in Minecraft?
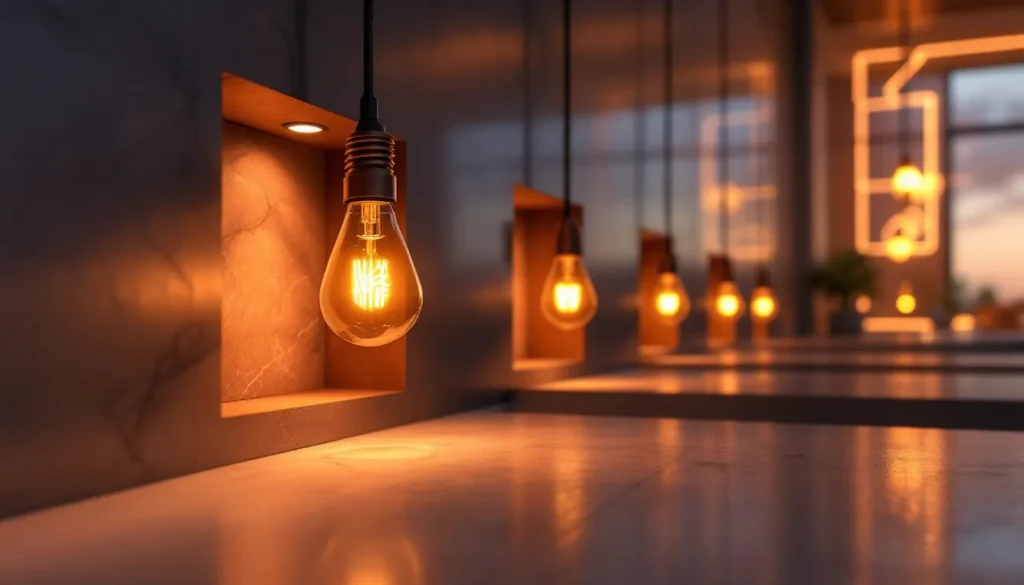
Copper bulbs are light-emitting blocks crafted from raw copper, introduced in version 1.20 (Trails & Tales). They function as redstone-activated light sources that emit a warm, ambient glow with an ambient occlusion effect that gives them a sophisticated appearance compared to standard torches or glowstone.
Unlike torches or lanterns, copper bulbs require redstone power to emit light. When powered, they produce a light level of 15, the maximum in Minecraft, making them ideal for precision lighting designs. Their defining characteristic is oxidation: over time, they transition through weathering stages, changing color from raw copper (orange-brown) to exposed (tan), weathered (blue-green), and finally oxidized (deep turquoise). This progression isn’t just cosmetic: it affects the block’s behavior and visual identity.
They’re particularly valued in modern architecture, redstone labs, and technical builds where builders need precise control over when lights activate. Their compact size and elegant appearance make them a favorite for minimalist designs and contemporary builds across survival mode and creative servers.
How to Craft Copper Bulbs
Required Materials
To craft a single copper bulb, you’ll need:
- 3x Raw Copper (or Copper Ingot if you’ve smelted ore)
- 1x Blaze Rod
- 1x Redstone Dust
Raw copper is mined from copper ore found between Y-levels -16 and 112 (as of the current versions). Blaze rods drop from blazes in the Nether. Redstone dust is harvested from redstone ore, commonly found at Y-level 8 and below.
Crafting Recipe and Steps
The crafting recipe uses a specific pattern in the crafting table:
Arrangement:
- Top row: Raw Copper, Blaze Rod, Raw Copper
- Middle row: Redstone Dust, (empty), (empty)
- Bottom row: Raw Copper, (empty), (empty)
Place the three raw copper in the top-left, top-right, and bottom-left slots. Insert the blaze rod in the top-middle slot and redstone dust in the middle-left slot. The remaining four slots stay empty. One craft produces a single copper bulb.
For bulk production, you’ll need multiple trips to the Nether for blaze rods, they’re the bottleneck resource in this recipe. Consider setting up an efficient farm or finding a spawner-based setup if you’re building on a large scale. If redstone is your concern, building a how to make a redstone lamp in Minecraft guide adjacent to your copper bulb setup helps streamline your redstone infrastructure.
Understanding Copper Bulb Mechanics
Activation Methods
Copper bulbs are powered devices that require a redstone signal to function. Unlike torches, they don’t emit light passively. The activation methods include:
- Direct redstone dust connection: Place redstone dust adjacent to the bulb
- Redstone repeater or comparator: Wire these to the bulb for signal timing or strength detection
- Redstone component signals: Levers, buttons, pressure plates, tripwire hooks, and observers all trigger bulbs
- Powered blocks: A powered block adjacent to the bulb activates it
This requirement for active signaling is the core mechanic that makes copper bulbs superior for automation. You can control exactly when they light up, creating dynamic lighting effects synchronized with other redstone devices.
Light Emission and Brightness Levels
When powered, copper bulbs emit light level 15, the brightest possible in Minecraft. This makes them equivalent to glowstone or lamps in raw brightness. But, their actual visual appearance differs due to particle emission and the warm color palette, which gives builds a more refined aesthetic.
The light propagates in a 15-block radius from the source, following standard light spreading mechanics. In terms of mob spawning, light level 8 or higher prevents hostile mob spawning, so a single copper bulb affects a substantial area around it.
One critical detail: copper bulbs emit light only when powered. If a signal cuts out, the light immediately stops, unlike day/night cycle-based sources. This makes them perfect for conditional lighting controlled by player actions or automated systems.
Oxidation and Weathering Effects
Copper bulbs oxidize naturally over time, transitioning through four stages:
- Raw Copper (0% oxidation): Orange-brown color, default state when crafted
- Exposed Copper (25% oxidation): Tan/beige appearance, occurs after ~20 in-game days
- Weathered Copper (50% oxidation): Blue-green patina forms, ~40 in-game days
- Oxidized Copper (75% oxidation): Deep turquoise/teal color, ~60 in-game days total
The oxidation progression is purely visual and doesn’t affect mechanical function or light output. A fully oxidized copper bulb still emits light level 15 when powered. But, you can halt oxidation using honeycomb: craft the bulb with honeycomb in the crafting table to “wax” it, preventing further oxidation at its current stage.
Many builders intentionally use copper bulbs at different oxidation stages to create color-graded lighting systems or aesthetic variety in their builds.
Placement and Installation Tips
Best Locations for Copper Bulbs
Copper bulbs work best in applications where you need controlled, signal-dependent lighting. Optimal placement scenarios include:
- Interior architectural features: Embedded in walls, ceilings, or custom light fixtures where redstone activation adds functional design
- Exterior facades: Modern homes benefit from copper bulbs in recessed panels or window frames that respond to player proximity or night detection
- Redstone labs and technical spaces: Where visual feedback and lighting synchronized with circuitry is essential
- Decorative lighting arrays: Gardens, pathways, and showcase areas where on-demand illumination is desirable
Avoid placing copper bulbs in purely decorative roles where you need constant, ambient light (use torches, lanterns, or how to make a lantern in Minecraft alternatives instead). They shine brightest when their activation is meaningful and tied to redstone logic.
Orientation and Positioning
Copper bulbs are directional blocks. They can face six directions: up, down, north, south, east, and west. When you place a copper bulb, it orients toward the face you clicked, which doesn’t mechanically matter but affects appearance in some builds.
Spacing is important for visual appeal. Unlike individual torch placements (which require wall spacing), copper bulbs can be packed densely since their light spreads predictably. For even illumination, space them 15 blocks apart if you want no overlap, or closer if you prefer gradient lighting. In tight architectural spaces, a single bulb often suffices due to light level 15 reaching far.
Wiring logistics matter in large builds. Copper bulbs benefit from centralized redstone control: run a single power line to a section of bulbs rather than hardwiring each individually. This reduces copper dust cost and makes modifications simpler if you’re iterating on a design.
Creative Building and Design Applications
Modern Architecture and Aesthetic Builds
Copper bulbs have become the cornerstone of contemporary Minecraft architecture. Their warm glow and sleek appearance pair exceptionally well with copper blocks, deepslate, and polished blocks.
Most modern architects embed copper bulbs into custom light fixtures: carved panels, recessed wall details, or integrated ceiling systems that reference real-world minimalist design. Exposure of the bulb block itself is usually avoided in favor of wrapping it with stairs, slabs, or trapdoors to create custom light fixtures that maintain the design language.
The color progression of copper bulb oxidation has inspired intentional weathering builds. Some builders deliberately construct with bulbs at different oxidation stages to create aged or vintage-looking structures. Others wax them at specific stages to “freeze” time and create deliberate color schemes matching their architectural vision.
Groupings of copper bulbs create striking visual impact. A wall of 9-16 bulbs (3×3 or 4×4 grid) behind glass or in a recessed panel creates dramatic accent lighting. Night-time activation via redstone creates the impression of intelligent lighting responding to player presence.
Redstone Contraptions and Automation
The signal-dependent nature of copper bulbs makes them invaluable for redstone engineers. Practical applications include:
- Proximity detection: Combine copper bulbs with motion sensors (observers detecting mob movement) for security lighting
- Day/night automation: Daylight sensors trigger bulbs at dusk, creating automatic exterior lighting
- Player detection: Tripwire hooks or pressure plates activate bulbs when players approach, useful for interior lighting systems
- Status indicators: Different bulb groups indicate machine states or resource counts in large redstone farms
Advanced builders layer copper bulbs with repeaters and comparators to create blinking effects, fade sequences, or synchronized lighting patterns. The warmth of their light makes them ideal for industrial aesthetic builds where functional lighting doubles as decoration.
If you’re not yet comfortable with redstone logic, reviewing technical guides on other light sources helps establish foundational concepts before tackling complex copper bulb circuits.
Decorative Lighting Solutions
Beyond pure function, copper bulbs serve decorative roles that elevate visual impact. Common applications:
- Underwater installations: Placed within glass domes or columns, copper bulbs create ethereal underwater bases with controlled lighting
- Themed pathways: Alternating rows of bulbs guide players through landscapes while maintaining aesthetic consistency
- Custom signs and displays: Bulbs outline lettering or frame informational displays with dynamic, professional lighting
- Event spaces: Arena lighting, stage setups, and gathering places benefit from centralized bulb control that can be toggled for different events
The warm color palette of raw and exposed copper bulbs pairs naturally with warm blocks like wood, clay, and terracotta, making them ideal for cozy, inhabited spaces. Weathered and oxidized stages offer cool-toned alternatives for futuristic or ancient-themed builds.
Advanced Tips and Troubleshooting
Combining With Other Light Sources
While copper bulbs are powerful standalone, combining them with complementary light sources creates layered, dynamic results:
- Torches and lanterns: Use permanent torches for ambient fallback lighting, copper bulbs for dramatic activation lighting
- Glowstone and amethyst: Layer different color temperatures: glowstone’s yellow pairs with copper’s warmer tone for cohesion
- Candles: Recent additions, candles provide small-scale accent lighting that copper bulbs complement without overwhelming
- Neon tubes (modded or custom structures): In creative builds or servers with custom lighting plugins, copper bulbs integrate seamlessly
The key principle: avoid redundancy. If you’re building a room with copper bulbs, secondary light sources should either serve a mechanical purpose (spawner prevention, mob farm visibility) or provide subtle accent lighting that doesn’t wash out the bulb’s visual impact.
Performance Considerations
Copper bulbs have minimal performance overhead compared to other light sources. But, large-scale deployments merit consideration:
- Rendering load: 1000+ active copper bulbs in a single region can affect FPS on lower-end machines. Spread bulb-heavy builds across your world if performance is a concern
- Redstone updates: Excessive redstone dust and repeaters feeding bulbs generate tick updates. Optimize circuits with repeater delays where instant propagation isn’t necessary
- Memory footprint: Each copper bulb is a single block with negligible data cost: bulk isn’t an issue unless you’re using millions
Modern Minecraft versions (1.20.4+) handle copper bulbs efficiently. If you notice frame drops, reduce the number of simultaneously active bulbs in view rather than culling overall use.
Common Issues and Solutions
Bulbs not turning on: Verify redstone signal reaches the bulb. Test with a lever directly adjacent. Common causes include broken signal paths, repeater lockouts, or comparators in incorrect modes.
Light flickers or inconsistently activates: Redstone dust placed diagonally doesn’t power blocks reliably. Switch to powered blocks or repeaters to ensure stable signals.
Oxidation progressing too quickly (or not at all): Oxidation requires the bulb to be exposed to sky or loaded chunks. Bulbs in unloaded chunks don’t progress. If a bulb isn’t oxidizing, ensure it’s in an active chunk and exposed to open air or water (water speeds oxidation slightly).
Waxed bulbs won’t unwax: Once waxed with honeycomb, copper bulbs can only be unwaxed via axe (right-click with any axe). Some servers disable this: check server rules if unwaxing fails.
Bulbs too bright for aesthetic: Use them sparingly or pair with darker block palettes. Positioning bulbs behind glass or slabs reduces apparent brightness while maintaining visibility. Alternatively, use fewer bulbs spaced further apart.
For more complex redstone troubleshooting, communities on gaming forums and resources maintain active guides on signal propagation and circuit debugging that extend beyond copper bulb-specific mechanics.
Conclusion
Copper bulbs represent a meaningful evolution in Minecraft lighting design. They bridge the gap between purely decorative light sources and functional redstone components, enabling builders to create spaces where lighting itself becomes part of the mechanical and aesthetic narrative.
From straightforward automatic lighting systems powered by daylight sensors to complex redstone installations that coordinate bulk operations, copper bulbs adapt to ambition at any level. Their natural oxidation arc and warm coloring make them inherently visually engaging without requiring mods or resource packs to feel contemporary.
The key to mastering them lies in understanding their signal dependency as a feature, not a limitation. Whether you’re lighting a sprawling mega-base, designing a compact survival starter home, or building experimental redstone contraptions, copper bulbs offer precision and aesthetic appeal that justify the modest crafting investment. Start with simple proximity-triggered systems, then expand into layered automation and multi-room coordination as your confidence grows. Your builds, and your players, will notice the difference when lighting becomes intentional.
More Stories
Minecraft Slope Unblocked: The Complete Guide to Playing Anywhere in 2026
How to Build Epic Minecraft Skyscrapers: Design, Tips, and Techniques for 2026
How To Build An Epic Spruce House In Minecraft: The Complete 2026 Design Guide